
The Aluminum Mallard
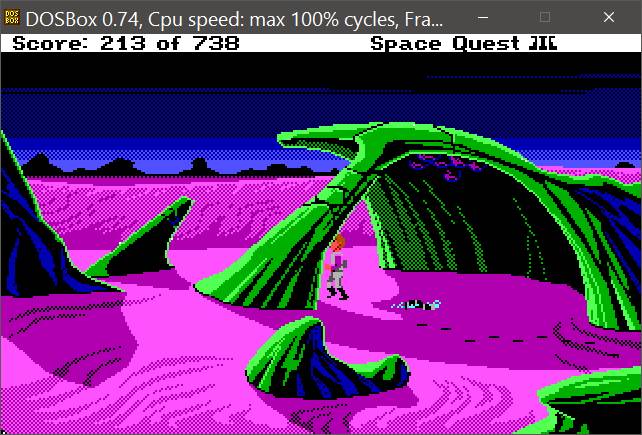
Notice the small, round, turquoise thing on the ground near the bottom edge of the light grey area. Look at object - ah, a warp motivator; that might be useful at some point.
Go one screen south and one screen east. Walk over right in front of the vertical conveyor on the right. You should get snatched by a bucket moving upwards. If not, move a little closer. On the next screen, you will be deposited onto another conveyor belt, and then the screen will change again as you move to the right. Immediately stand and then jump. You will pull yourself onto the rail above the conveyor.
Go three screens west. Walk over to the device hanging from the rail -- a trash grabber -- and get in grabber. Using the normal controls, go west; the rail wraps around and you will exit heading east. Stop and look. You want to stop the grabber at the red support beam on the rear rail that is the first one past the second of the two you see in the foreground. (In other words, it looks like it would be the fourth in the background, if you could see the third one.) Move the grabber east to that beam and stop it. Look at the grabber. Press claw. The grabber will pick up the warp motivator that was lying on the ground where you started.
Go three screens east. As soon as you round the curve and are heading west again, stop. Press the claw button again to lower the motivator into a ship that's underneath you (which we haven't yet seen). Go all the way back west to the room where you got into the grabber. Continue a bit until you are next to the blue ramp between the two support beams. Get out of the grabber and go south. (Oops!) Look at the west wall. Walk over to the wall. Look into the hole. Take the reactor. Exit via the ladder in the northeast part of the screen. Take note of where you emerge, behind the round pod at the bottom left, and then take the ladder.
Go north and then east two screens. Take the bright green wire that's near the west edge of the screen. Continue east until you are assaulted by one of the rats. Return west and south to the place where you came up and use the ladder. Climb down into the rats' den. Hmm, seems the lights are back on. Walk over to the west wall and look in the hole again. Take the wire and reactor. Leave the same way as before. Take the ladder when you come out.
Retrace your steps north and then east three times. Look at the head. Walk to a spot underneath the Battlebot's broken eye, next to the vents. Climb into the head. Look at the ship. (Hey, this is the one you put the warp motivator in!) Walk to the southeastern side of the ship, use the ladder, and climb it. Walk carefully to the hatch and open it.
Look. Look at the computer. Use reactor to provide a power source. Use wire to connect it to the power cables. Look at the computer again. Sit in the pilot's seat and search it. Look at the screen. Select Radar (7), Engines (1), and then Takeoff (3). Before you crash into the roof, select Weapons System (8). Put up the Shields in front (F) and press Fire (spacebar). Look at the screen again. Select Navigation (2) and then Scan (1) twice. Set course for Phleebhut (2). Press Light Speed (5). Watch the cut scene. (I guess this was topical at the time...?)
For Your Amusement:
Get the piece of metal leaning against the Jupiter 2 (large blue ship that says "JUP" on screen). (save first)
Get carried along into the trash shredder. (save first) (Not a pretty sight!)
Phleebhut
When you are in orbit around Phleebhut, press Land (3). Stand up and press the red button to exit the ship. If you encounter a scorpazoid on any screen, quickly exit and return.
Go west and north two screens, avoiding the overhanging rock with the pulsing pods (we'll be back to this one). Read the sign. Go west and enter the building. Sell Fester the glowing gem you have mysteriously kept from Space Quest 2. Refuse his first two offers; sell it for 425 buckazoids. Buy the hat, the Orat on a Stick, and the Thermo-Weave underwear. Leave. Arnoid will appear and grab you, but let you go so he can hunt you down again. Save the game.
Go two screens east and two screens south. Look out for Arnoid on the way; if you keep moving quickly, and move away when you see his footprints, you'll probably be fine. Back at your ship, save the game again. Go west from the southern part of the screen. Stand near the overhang, but not under the pods. When you see Arnoid's footprints, quickly go under the western part of the overhang. If you do it right, the pods will catch Arnoid and he'll be off your back. Notice that the pods spit out some gunk, including Arnoid's invisibelt. From where you are under the left "strut" of the rock structure, use the Orat-on-a-Stick to grab the belt.
This can be a pain in the neck to accomplish and may take numerous tries. See screenshot below for a path that worked for me:
(Alternate solution for fewer points: go one screen west after exiting the World o' Wonders and enter the doorway. Stand on the lift and press the button. Go up the stairs and stand behind a pulley, facing the stairs. When Arnoid steps off the top of the stairs, grab pulley to shove it in Arnoid's direction. Crunch! Go back down to the bottom and take the belt. If you do have the pods eat Arnoid, there's also an alternate solution to picking up the belt, rather than using the Orat-on-a-stick: Get back in the Mallard and scan for Ortega. Go there and follow the instructions below for getting the pole from the ScumSoft survey site. Return to Phleebhut and use the pole to get the belt.)
Wear the belt. Return east to the ship and walk up the ramp. Sit in the seat and look at the screen. Press Engines and Takeoff. Look at the screen again. Press Navigation and Scan twice. Set course for Monolith Burger and go to Light Speed.
For Your Amusement:
Walk under the pulsing pods. (save first)
Open the glass case outside the World o' Wonders. (save first)
Read all the postcards.
Wear the hat.
Monolith Burger
When you have arrived, walk west one screen and approach the clerk. Look at the menu. Order the Fun Meal (7), answer Yes to all the questions (not that it matters) and pay. Sit at the empty booth and eat. You will find a decoder ring. Stand up and walk over to the arcade game. Play game. Watch the instructions. Slow the game all the way down if you want to actually play Astro Chicken. Insert a buckazoid. You must play the game ten times, although it doesn't matter plotwise if you land any chickens or not. (To get the maximum game score, you have to land ten chickens.) After the tenth game, a message will appear on the screen. Use the ring. You can actually decode the message if you find that kind of thing to be fun, but the gist is that you need to rescue the Two Guys who are being held prisoner on Pestulon. Walk back into the airlock and enter ship. Look at the screen. Turn on the engines and the navigation system. Scan twice and set course for Ortega. Go to Light Speed.
For Your Amusement:
Order the Big Belcher, and then return to your ship.
Ortega
When you are orbiting Ortega, land and stand up. Wear the ThermoWeave underwear. Press the red button. Go south, west, across the bridge (keep moving, or you'll be shaken off into the lava), and south. Wait until the ScumSoft guys leave. Look through the telescope. Take the pole with the spinny things on top that's on the right of the screen. Look at the green crate on the ground near the pole. Take one of the thermal detonators.
Go east two screens and then north. Walk behind the top right group of rocks and you will find a pathway leading down. Go west down the stairs. Go east. Go over to the red ladder and climb it. Walk as close as you can to the edge of the generator and drop in the detonator. Save the game.
Climb back down the ladder and retrace your steps to the rock bridge: West, south (will take you up the stairs), south, south, west (exit to the north of the boulder, not to the south, or you may walk into a crevasse), west, north. Vault across the now-missing bridge by saying use pole. Continue east and north back to the Mallard and get in. Sit down, look at screen, turn on the engines, and take off. Look at the screen again. Turn on the navigation system and scan four times. Set course for Pestulon and use cruise speed (4) this time. When you arrive, land, stand up, and press the red button. Save the game.
For Your Amusement:
Exit onto the surface of Ortega without wearing your ThermoWeaves. (save first)
At the survey site, kill men.
Pestulon
Walk in any direction. Turn on the invisibility belt and enter ScumSoft. Go past the guards and down the stairs. Press the button next to the door. Slow the game all the way down. Go north. Enter the second door (it will be on your left). To do this, you have to turn to your left and walk straight at it. This may take a number of tries. (It may help to anticipate the move after you see the first door, on the right, and start walking into the wall to your left. Once you pass a second door on your right, with a panel, keep going, because the left door after that leads back to the outside.) Look at the closet. Wear the coveralls. Leave and return south to the first door that was on the other side of the hall. Save the game and go through. You can speed up the game again.
Walk over to the trash can that is immediately to your left and vaporize trash. As you walk through this office maze, vaporize the trash in every wastebasket you encounter. If you don't, you'll be found out and killed. You also need to be standing in a certain small place relative to each can to hit the trash; if you miss too many times, your bad aim will also give you away, so save after every few successes in case you screw up.
Go north a little bit around the cubicle wall and go west down the first possible passage. Walk to the portrait hanging on the solo south-facing cube wall and take it. Go to the copy machine and copy the picture. Put the original back on the wall (hang picture works). Return east and then go north again to the second westward passage. Go northwestish to pass the desk and then head back east. Go south as far as you can, then east to the northward passage that leads off screen. (To get the last trash can, you have to stand so you are hidden behind the white pillar.)
You will find yourself facing Elmo's office. Immediately leave the screen to the south and return and Elmo will be gone. Walk into Elmo's office and examine the desk. Take the keycard. Return south and west. Go south to the third eastern passage. Exit south and you will be back in the circular hallway.
Slow the game down again and head north. Pass by the closet and stop at the door with the computer screen next to it. Use the keycard. Hold up the copy of Elmo's picture. Enter the doorway (just press the right arrow key - it doesn't look like you're lined up correctly, but it does work). Press button to extend a walkway (it can't be seen it on the screen, but you appear to know it's there). Walk up to the jello and vaporize jello. At this point there is a bit of a scene and you will be captured by ScumSoft security and stuck into a Nukem Dukem Robot.
For Your Amusement:
Notice the two guys with whips on the left of the screen with Elmo's office. These are Ken Williams (on the left) and Rick Cavin (on the right), who was head of Production when SQ3 was being made.
Irritating Endgame Arcade Sequences
After Elmo is done speechifying, press any key to start, and immediately save the game. Slow down the game speed. Wait for Elmo to approach you and watch his feet. When he starts to take a step towards you, punch him (J). If you get the timing right, you will interrupt his animation, and be able to punch him repeatedly with impunity. Maintain a few saves; save every time you've reduced his power a bit, and restore if your power is going down. When you defeat Elmo, you and the Two Guys will escape to the Mallard. Save the game again.
Look at the screen. Select Attack Speed and turn on the weapons system. Switch the shields to the back (B). ScumSoft will be sending fighters after you. They alternate their approach from the rear and the front. The ones that come directly from the front cannot be tracked and fired on. Those that come from the rear will shoot you first, and then appear in front to be tracked with the arrow keys. You must down five of the enemy to win. Switch your shield directions after each attack. Your shields can withstand 11 hits and the 12th will make you so much space vapor. There's not much room for error, because they get 9 free hits on you from their first shots when coming from the rear and from the fact that you can't shoot them when they come from the front. So, save after each one you shoot. When you have killed the last of them, return to the cockpit view by pressing Off (O) and then F6. Watch the ending cutscene.
For Your Amusement:
Read all the end credits.
Extras
For further entertainment, you may be interested in information on unused game resources, differences between game releases, debugging mode tricks, etc. at The Cutting Room Floor.
Points
| Action | Points | Action | Points |
|---|---|---|---|
| The Aluminum Mallard | Ortega | ||
| Get onto vertical conveyor | 5 | Buy fun meal | 10 |
| Jump onto rail above conveyor | 10 | Get decoder ring | 10 |
| Pick up motivator with claw | 15 | Land Astro Chicken 10 times | 50 |
| Drop motivator into ship | 15 | Get secret message | 50 |
| Fall down chute | 5 | Use decoder ring | 20 |
| Get reactor | 15 | Wear thermal underwear | 10 |
| Get ladder | 10 | Look through telescope | 10 |
| Get wire | 5 | Get thermal detonator | 10 |
| Climb through eye | 5 | Get pole | 10 |
| Use ladder | 5 | Drop detonator in generator | 20 |
| Open hatch | 10 | Pole-vault | 20 |
| Install reactor | 5 | ||
| Install wire | 5 | Pestulon & Endgame | |
| Search seat | 10 | Enter ScumSoft | 25 |
| Fire lasers at roof | 25 | Wear coveralls | 5 |
| Copy picture | 5 | ||
| Phleebhut | Get keycard | 5 | |
| Sell gem for 425 buckazoids | 8 | Use keycard and picture | 20 |
| Buy Orat on a Stick | 5 | Vaporize jello | 10 |
| Buy hat | 5 | Beat Elmo in Nukem Dukem Robots | 100 |
| Buy Thermo-Weave underwear | 5 | Destroy 4 enemy ships | 100 |
| Kill Arnoid with cave pods | 45 | ||
| Get invisibelt | 35 | Total | 738 |
Last updated: 9/02/2024